Supported Versions: 3.8, 3.9, 4.0, 4.1, 4.2, 4.3, 4.4, 4.6
Nopcommerce multi tenant: A multi website system uses a system of files, a database. Each administrator account can only see and manage the products, categories, manufacturers, customers, orders, configurations, topics, campaigns, blogs, news, etc .. of each store
Administrator account (Admin): Can see and edit entire categories, products, orders, customers etc .. of all the stores..
You can download the demo for test on the link below.
http://nopplugin.com/download/NopcomerceMultiTenantNoSource_4_6.rar
Language pack
http://nopplugin.com/download/language_pack.rar
If find it useful, you should purchase an enhanced version so you be able to upgrade to the next version of nopcommerce. In the enhanced version, You will have developer documentation and source code attached.
In the process of paypal payment if you get any faulty you can pay via paypal account haiquank1a@gmail.com. Then we will send you the source code.
1. Store 1
Demo : http://nopdemo.com/
User/Pass: demo1@nopdemo.com/123456789
2. Store 2
Demo : http://store1.nopdemo.com/
User/Pass: demo2@nopdemo.com/123456789
3. Store 3
Demo : http://store2.nopdemo.com/
User/Pass: demo3@nopdemo.com/123456789
3. Account admin:
User/Pass:admin@nopdemo.com/123456789
Step 1: DNS settings for the domain (store1.nopdemo.com, store2.nopdemo.com, nopdemo.com):
- You need to point the domains to the same IP address

Step 2: Add a domain alias:
- Add domain alias: store1.nopdemo.com & store2.nopdemo.com for the domain nopdemo.com (Uncheck Redirect with the HTTP 301 code)

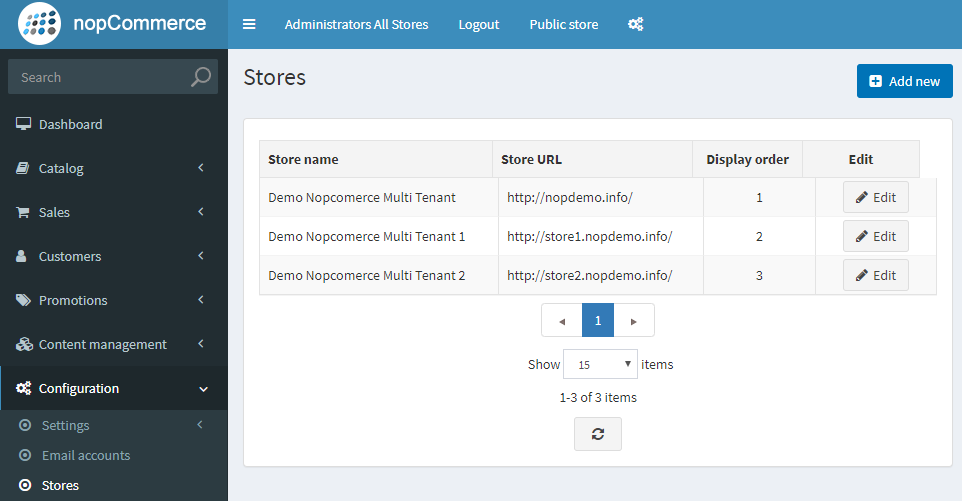
Step 3: Create a stores:

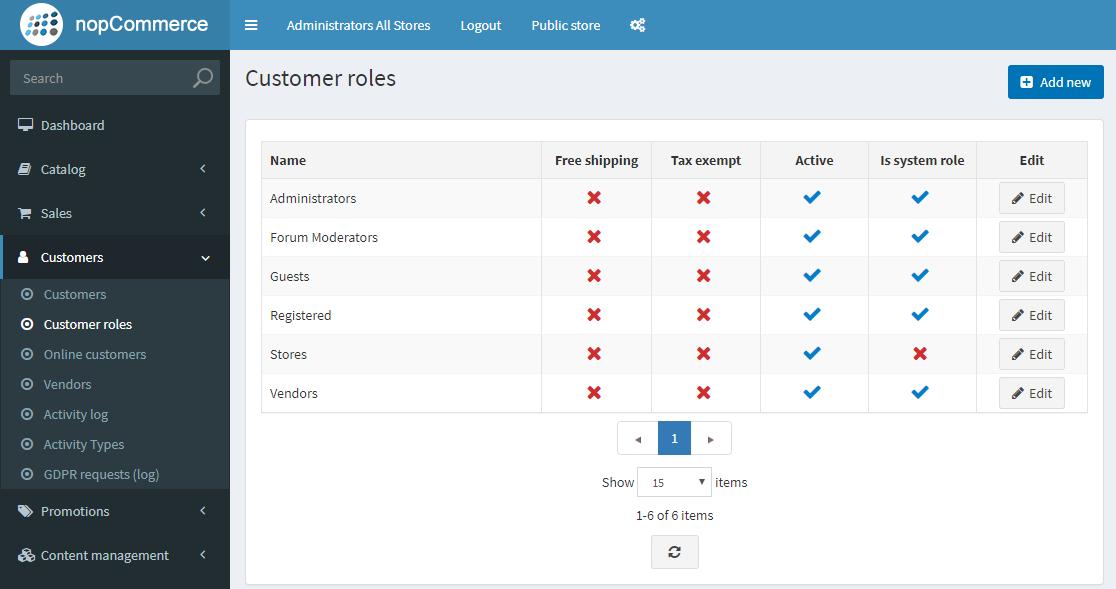
Step 4: Create Customer Stores roles:

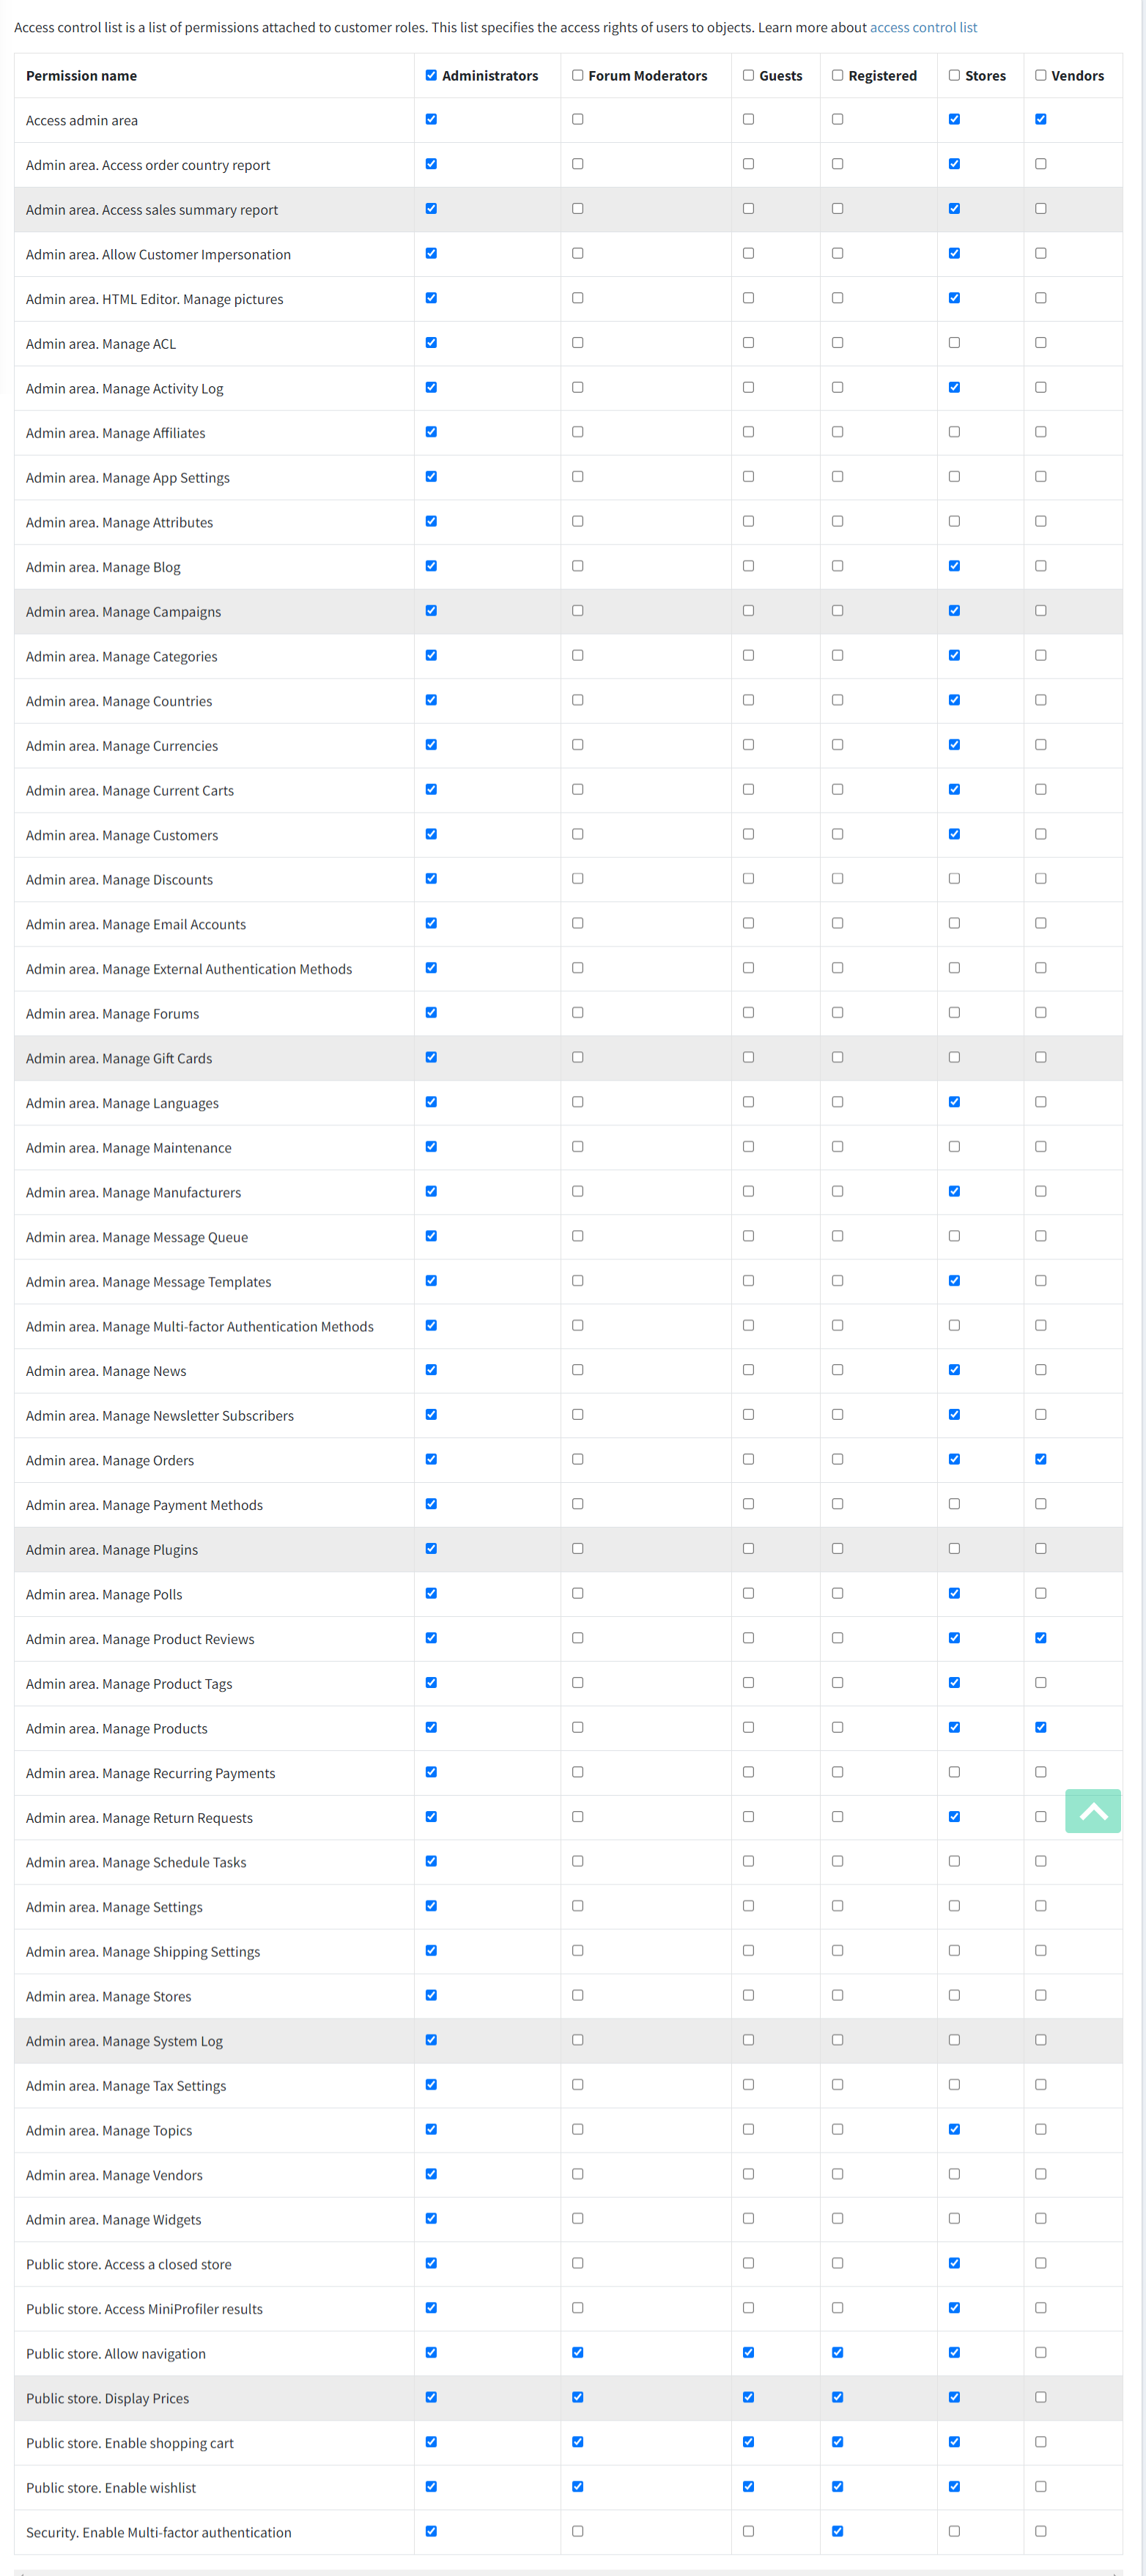
Step 5: Access control list ( Configuration/Access control list):
Check Stores role:
- Access admin area
- Admin area. Access order country report.
- Admin area. Allow Customer Impersonation
- Admin area. HTML Editor. Manage pictures
- Admin area. Manage Blog
- Admin area. Manage Campaigns
- Admin area. Manage Categories
- Admin area. Manage Countries
- Admin area. Manage Currencies
- Admin area. Manage Current Carts
- Admin area. Manage Customers
- Admin area. Manage Languages
- Admin area. Manage Manufacturers
- Admin area. Manage Message Templates
- Admin area. Manage News
- Admin area. Manage Newsletter Subscribers
- Admin area. Manage Orders
- Admin area. Manage Polls
- Admin area. Manage Product Reviews
- Admin area. Manage Product Tags
- Admin area. Manage Products
- Admin area. Manage Return Requests
- Admin area. Manage Topics
- Public store. Access a closed store
- Public store. Allow navigation
- Public store. Enable shopping cart
- Public store. Enable wishlist
Step 6: Create a user account:
Sign in Administrator account (admin@nopplugin.com) or use the register. After creating the account is assigned: Registered, Stores
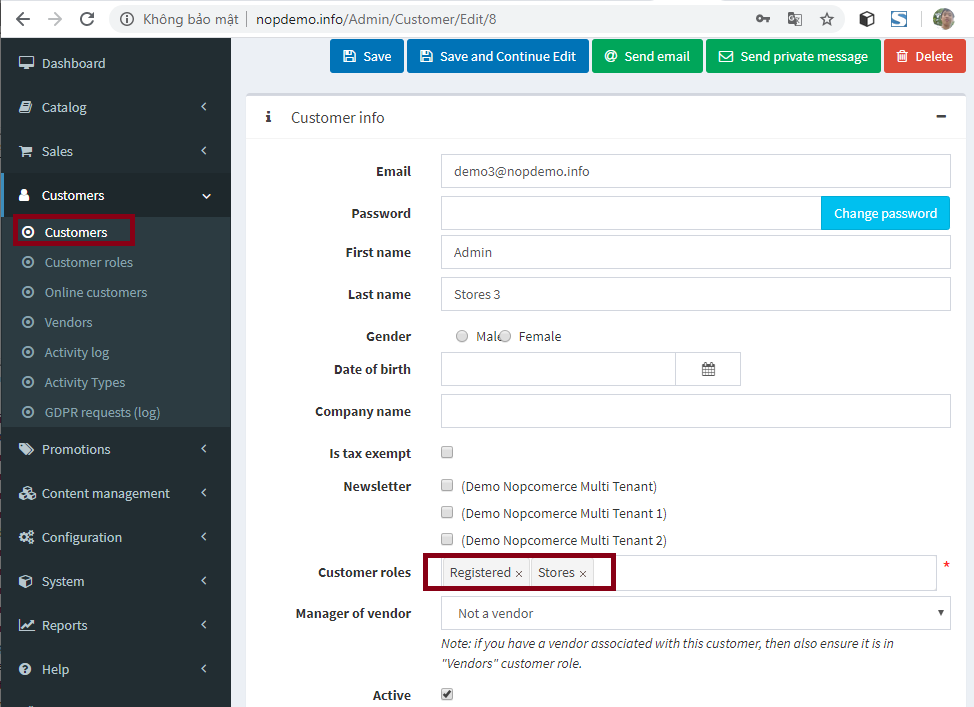
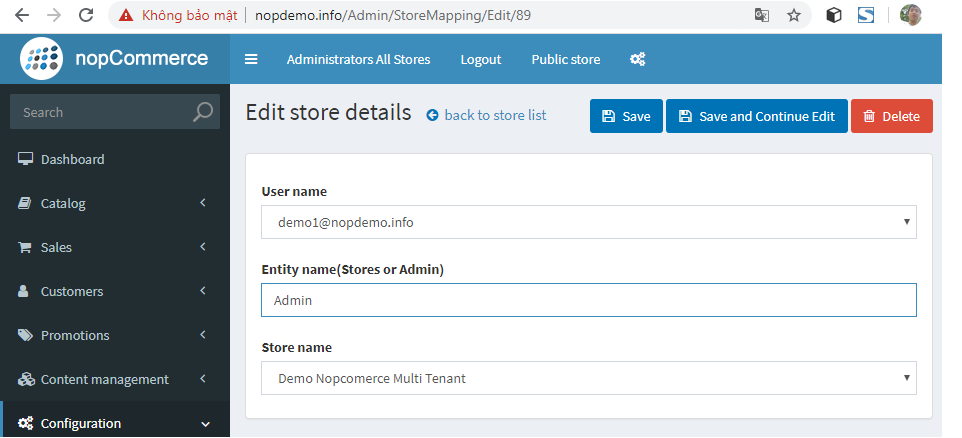
Step 7: Mapping users to stores:
Step 8: Catalog settings(/Admin/Setting/Catalog)
Skip the Ignore setting "limit per store" rules (sitewide)

Configure Multiple Store E-mail Accounts
1. Connect to Database: update [MessageTemplate] set [EmailAccountId] = 0
2. Go to Email accounts. Add a new email account

3. Go to Configuration/Settings/All settings (advanced) - /Admin/Setting/AllSettings
4. Search Setting name: emailaccountsettings.defaultemailaccountid
5. Add new record with
- Setting name: emailaccountsettings.defaultemailaccountid
- Value: Email Id in Email accounts
- Store : Store Id

6. Result


